The internet gives you access to the entire globe. Anything you want to access is just a click away, from laughing at your favorite shows to cringing at the headlines. If you’re a parent or a teacher, though, this may be concerning.
That’s when parental control comes in handy. Parental controls can assist to limit the likelihood of your kid accessing unsuitable online content. In addition to installing parental controls, it’s critical to keep an eye on your child’s online behavior and utilize device settings that are suitable for his or her age.
So what can this parental control do?
Parental controls are software or device-specific settings that allow parents to keep track of their children’s online activities. They keep kids away from improper, unsuitable, or unlawful information on the internet. They can be used by your internet service provider, search engines, video streaming sites, chat software, and other applications. The following preventive measures can be used by parental controls:
- Control or prohibit your child’s access to video games.
- Filter web browsers so that only pre-approved websites are shown.
- Children should not be allowed to use certain services.
- Control search engines to limit what a youngster can look for on the internet.
All these functions may sound intriguing but finding out how to install parental controls on each device, on the other hand, might be difficult. Here’s a simple way how you can set up and use parental controls on Windows 10.
Two features are activated by default when you establish a kid account: tight browsing parameters in Microsoft Edge and blocking InPrivate browsing in Microsoft Edge. You’ll have parental controls set up on that individual account in addition to the ability to monitor the child’s account.
- Step 1

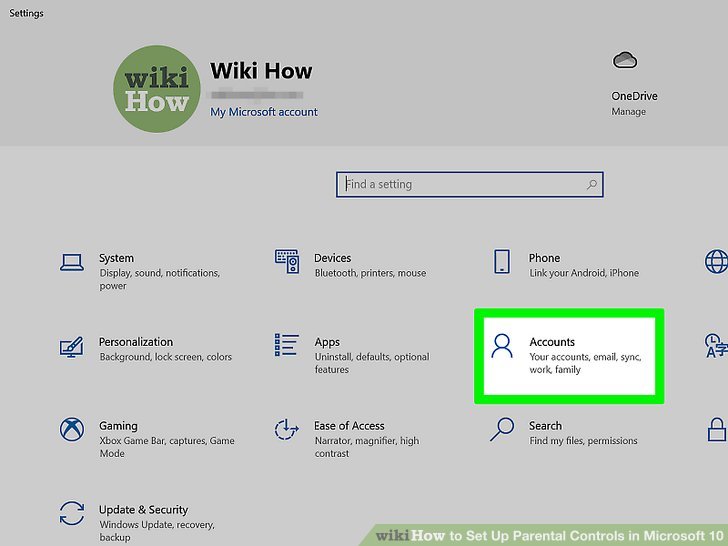
Press ‘ ⊞ Win+I ’ to open settings. You can also click the Start Menu and click on the gear icon to go to setting. Note that if the account you wish to set up parental controls on does not exist, use this procedure. This approach should not be used if they already have an account.
- Step 2

Click ‘account’
- Step 3

Click ‘family & other users’. It’s next to a default profile icon with a plus symbol in the panel on the left side of the window.
- Step 4

Click ‘add family members’ It’s beneath the “Your Family” header, next to a Plus.
If asked, enter your computer’s password.
- Step 5

Click ‘create one for a child’. (If your child doesn’t have a Microsoft email). If your child already has a Microsoft email address, you may use it to establish an account and skip the following step.
- Step 6

Follow the on-screen instruction to create a Microsoft account. Choose either a @outlook.com or @hotmail.com domain extension for the child account’s email address. To continue, click Next, and then establish a password for the account. To continue, click Next. Fill in their name. To proceed, you’ll need to provide the account holder’s first and last name. To continue, click Next. To complete the account creation process, enter your birthday, then click Next and Close.The label “child” will appear on the account to signify that parental restrictions have been enabled.
- Step 7

Sign in to the child’s account. To complete the procedure, you’ll need to sign into that account while connected to the Internet. To switch users, hit the Windows key and then click your profile image in the Start Menu, followed by the name of the kid account.
Try these 7 easy steps to secure your account and keep yourself free from worry about what your chld can access.


Leave a Comment