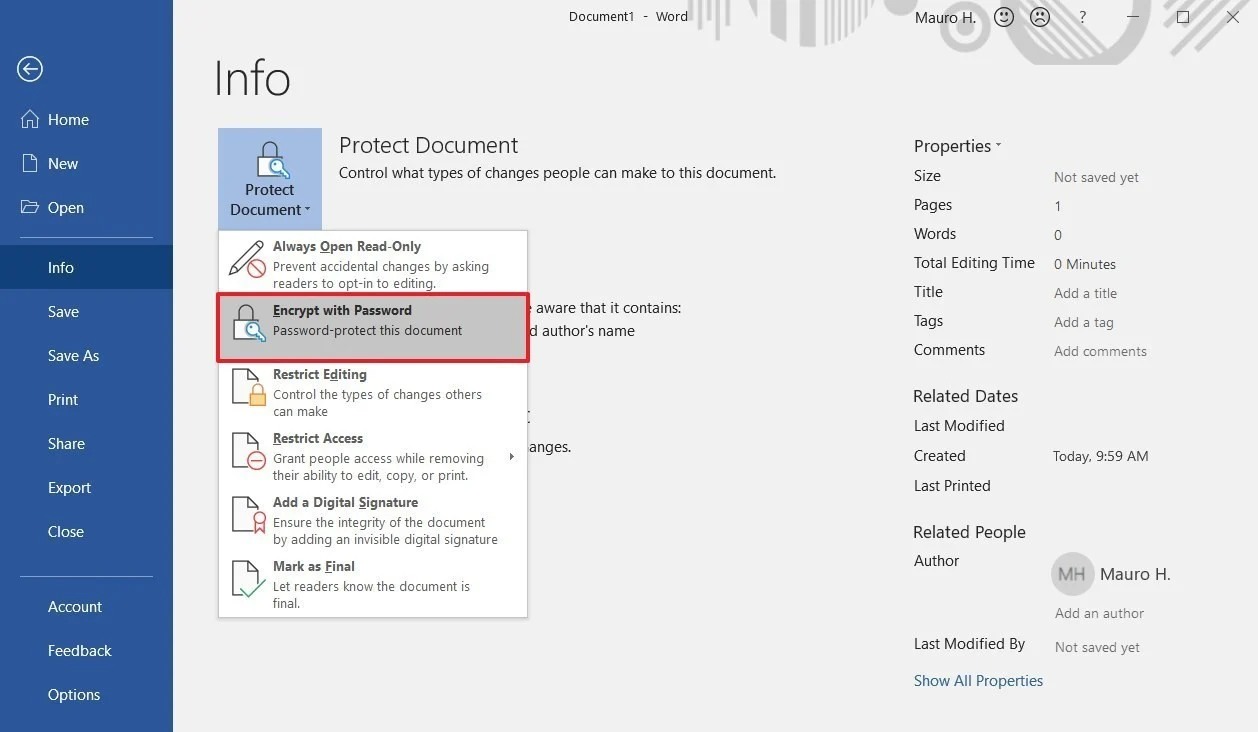
Microsoft Word users, especially students, should know how to lock files or documents with a ‘password’. Because, in today’s digital age, privacy is very important to every individual who uses technology.
If before, we have explained the easiest way to sign your Microsoft Word document. You can check out the article here. The article described five easy steps for you to follow.
Going back to how to place a password, this is to prevent your Word file or document from being tampered with or copied and pasted by others.
So, the file is protected and only you have access to open the file or document. How to do that?

Steps On How To Put Password On Microsoft Word
First of all, you need to first open Microsoft Word on your computer. Next, you need to click the ‘Review’ menu and select the ‘Editing Protection’ section.
Then, select ‘Filling in forms’ and click ‘Yes, Start Enforcing Protection’. Finally, enter the password and click ‘OK’.
How, it’s easy, right? It is hoped that these tips are useful for you. So that your Words files or documents are always not misused by irresponsible parties.
Just a reminder, passwords are case sensitive and can be a maximum of 15 characters long.
If you lose or forget your password, Word will not be able to recover it for you. Make sure you keep a copy of the password in a safe place. Or, create a strong password that you will remember.


